many of you have written to me for how to do to insert a watermark to the drawing area, so today I decided to make this little tutorial with which I will explain the steps, and the different possibilities.
As always, I apologize to my readers for my terrible "Google English" ^-^
1 - we open our model ans select Window > Styles. The Styles Browser is displayed Click on the Edit tab. 2- Click on the Watermark panel button. The Watermark panel is displayed.
3- Click on the Add button. The Choose Watermark dialog box is displayed. 4- Navigate to an image you will use as a watermark. 5 - Click the Open button >
The image will appear as a watermark in the background of the drawing area. The Create Watermark dialog box is displayed. 6 - Click either the Overlay button to have the image
appear in front of your model as an overlay
7 - Click either the Background button to have the image appear behind your model as a background watermark. 8 -Click on the Next button
9 - Move the Blend slider to the left to fade the watermark. Or, move the Blend slider to the right to fade the model. 10 - Click on the Next button
Position : There are three options for positioning your watermark. The first options are
11- Positioned in the screen button
Use the Positioned in the screen button option to position the watermark at one of nine pre-defined screen locations. Select the button in the Position matrix that best represents the location on the screen where you want your watermark.
12 - Sliding the Scale slider to the left decreases the size of the watermark. Sliding the Scale slider to the right increases the size of the watermark.
13 - second options : Tiled across the screen button. Use the Tiled across the screen button to create copies, ortiles,of the watermark and tile them across the drawing area. Sliding the Scale slider to the left creates progressively more, smaller, watermarks. Sliding the Scale slider to the right creates progressively fewer, larger, watermarks.
14 - Stretched to fit the screen button. Use the Stretched to fit the screen button to stretch the watermark across the drawing area. 15 - Selecting the Lock Aspect Ratio checkbox to cause the aspect ratio (height of image to width of image) to remain consistent such that the image is not distorted (the image might not fill the entire drawing area when aspect ratio is locked).
16 - Move the Blend slider to the left to fade the watermark. Or, move the Blend slider to the right to fade the model. Click on the Finish button
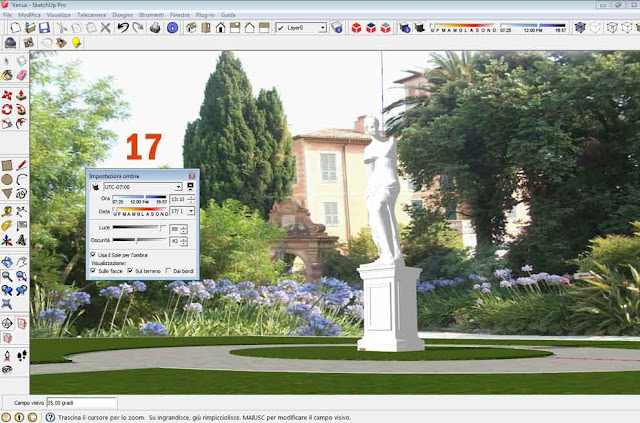
17 - Now open the setting window shades to adapt them to shadows of the inserted image
18 - Selecting the Display watermarks checkbox displays all active watermarks (all watermarks whose Active checkbox is selected). Deselecting the Display Watermarks checkbox hides all watermarks.
19 - select the thumbnail and then select the fingerwheel that you see to the number 19, to go back and change the position of the watermark - 20 - click on the "minus" if you want to remove the watermark. By clicking the "plus" sign in the same way, in one model, you can add different watermarks . As you have seen is all really very easy !


No comments:
Post a Comment
Note: Only a member of this blog may post a comment.